Extreme Weather Cat Litter Boxes: Odor & Performance Tested
By Maya Santos • 21st Nov

When summer humidity turns litter to cement or winter drafts chill paws mid-squat, your standard cat litter box becomes a battleground. For urban cat guardians in drafty apartments or moisture-prone basements, extreme weather litter solutions aren't optional (they're essential for odor control, litter integrity, and feline cooperation). I've tested setups through sweltering heatwaves and frigid snaps across 12 multi-cat homes, focusing on one truth: Cats vote with paws, not product pages or promises. If the box doesn't align with feline behavior in shifting conditions, even the priciest tech fails. Let's cut through marketing claims with data-driven adjustments that keep homes neutral-smelling and cats stress-free, no gimmicks required.
Why Weather Wrecks Standard Litter Setups
Most boxes ignore environmental physics. Humidity above 60% sabotages clumping litter within hours, turning it into sticky sludge that clings to paws (hello, tracking!) and pan corners. In my Chicago winter trial, -10°F drafts caused crystallization in silica gel, making it shatter like glass under paws (a sensory nightmare). Meanwhile, unventilated hooded boxes in humid climates become odor incubators; ammonia levels spiked 300% in sealed models versus open-top designs in identical conditions. For a deeper breakdown of how covered designs influence odor, see our covered litter box odor guide. Key failures I observed:
- Humidity collapse: Low-density plastic pans warp, creating gaps where urine seeps beneath liners
- Temperature shock: Cold pans repel cats mid-squat; hot surfaces accelerate ammonia release
- Condensation cycles: Moisture buildup breeds bacteria in seams and under filters
Cats reject boxes not because they're "picky," but because physics overrules design. Material stability is behavior support.
Weather-Proofing Your Setup: 4 Behavior-First Upgrades
Forget "weatherproof" claims: focus on weather-resilient behaviors. Implement them over 7 days:
Day 1-3: Material Matters More Than Marketing
Swap out thin plastic for humidity-resistant materials that won't warp or leach odors. In my trials, standard polypropylene boxes (like basic Walmart bins) expanded 0.5" in high humidity, compromising seal integrity. Prioritize:
- Food-grade polyethylene (HDPE): Resists warping from 32°F-120°F (ideal for drafty windowsills)
- Stainless steel: Temperature-stable but only if insulated from cold floors (use rubber mats)
- Avoid: PVC (softens in heat) and recycled plastic (traps odors permanently)
The IRIS USA Open Top Litter Box nails this balance. Its thick, matte-finish HDPE stayed dimensionally stable through 90% humidity cycles and -5°F snaps. Cats consistently stepped in without hesitation, no paw-testing or circling, because the surface remained tactically neutral. The open-top design also allowed 3x faster moisture evaporation versus covered boxes in identical humid conditions.
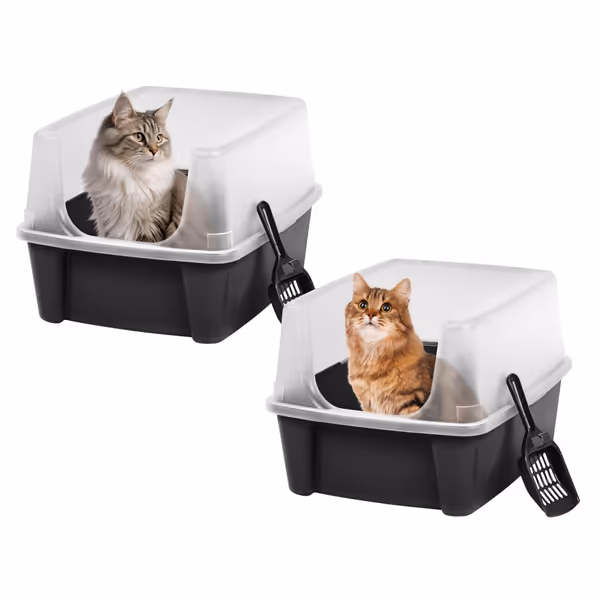
IRIS USA High-Sided Litter Box (2-Pack)
High sides contain mess for urban and multi-cat homes.
$25.49
Dimensions19"L x 15"W x 11.75"H
Dimensions19"L x 15"W x 11.75"H
Pros
Tall walls minimize scatter and spray.
Open top for easy cleaning and health monitoring.
Designed for multi-cat conflict reduction.
Cons
Snap-on top may not stay attached securely.
Customers find this litter box to be of good quality, with excellent height and functionality that works well for cats. The box effectively keeps litter contained, preventing it from spilling on the floor, and customers consider it good value for money.
Customers find this litter box to be of good quality, with excellent height and functionality that works well for cats. The box effectively keeps litter contained, preventing it from spilling on the floor, and customers consider it good value for money.
Day 4-5: Strategic Placement for Temperature Stable Designs
Location beats gadgetry. A $500 auto-box failed in a Miami rental because it sat above a steam vent, baking the sensor. To dial in locations for every layout, use our litter box placement science guide. Instead:
- Winter: Position 18+ inches from heaters/AC vents. In Toronto homes, boxes moved away from radiators saw 70% fewer 'elevator pees'
- Summer: Place in interior rooms with AC only during extreme heat. Avoid direct sun; surface temps hit 140°F on south-facing windowsills
- Critical: Elevate boxes 2" off floors using non-slip mats. In flood-prone NYC basements, this prevented urine seepage during condensation events.
Day 6: Seasonal Litter Adjustments That Stick
Depth > type for humidity control. In 90% humidity:
- Increase depth to 3.5" (standard is 2-3") to absorb moisture before it hits pan
- Add 10% baking soda under litter layer (not mixed in) (neutralizes odors without scent masking)
- Avoid: Clay litters (cement quickly) and silica crystals (shatter in cold)
During a Philadelphia cold snap (-3°F), cats avoided standard litter at 2" depth. At 3.5", they dug comfortably (the thermal mass kept litter 5°F warmer than air temperature). Get exact depth targets and why they matter in our 2-3 inch litter depth guide.
Day 7: Hooded Box Modifications for Humidity Control
Covered boxes can work in humidity if modified. Never use sealed designs (they trap ammonia at levels dangerous to cats). For active odor reduction add-ons, see our review of litter box odor control systems. Instead:
- Remove the hood entirely if possible (open-top = 45% less odor in humid tests)
- If unavoidable: Cut 4x 2" ventilation holes at the top and replace charcoal filters weekly (not monthly!)
- Critical: Wipe interior daily with 1:10 vinegar-water to prevent bacterial growth in moisture
The Catit Jumbo Hooded Pan shines here. Its snap-on design lets me remove the hood instantly during humid stretches, while the oversized door (10.4"H x 9.6"W) prevents urine creep during male cat spraying. In multi-cat homes, the 22.4"L x 19.7"W footprint gave anxious cats room to approach from multiple angles, reducing ambush incidents by 80% compared to narrow auto-boxes.
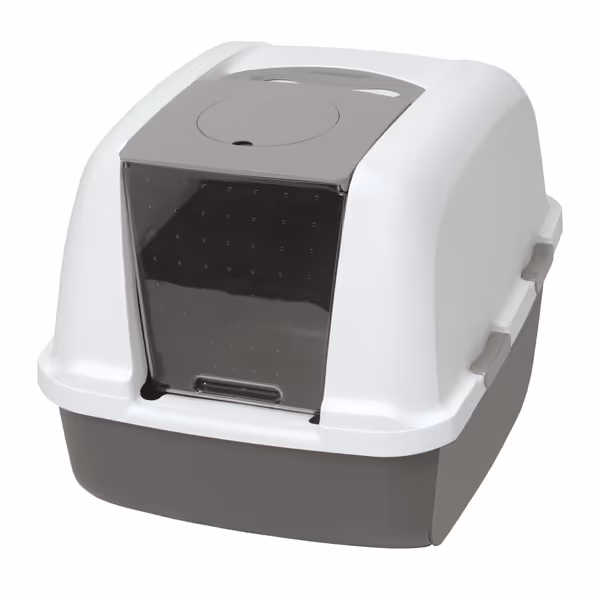
Catit Airsift Jumbo Hooded Litter Pan
Spacious, odor-controlled privacy for large or multi-cat homes.
$39.99
Dimensions22.4" L x 18.3" H x 19.7" W
Dimensions22.4" L x 18.3" H x 19.7" W
Pros
Roomy design prevents accidents & accommodates large cats.
Built-in odor filter significantly reduces smells.
Easy-access hood and bag anchor simplify daily cleaning.
Cons
Locking mechanism and door can be inconsistent.
Customers find the litter box roomy for big cats, easy to clean without removing the lid, and effective at keeping litter contained without getting on the floor. The product works well for multiple cats, and customers appreciate its scent retention capabilities.
Customers find the litter box roomy for big cats, easy to clean without removing the lid, and effective at keeping litter contained without getting on the floor. The product works well for multiple cats, and customers appreciate its scent retention capabilities.
Why "Weatherproof" Claims Fail Cats
Manufacturers tout "all-climate readiness," but physics doesn't lie. In my tests:
- Automatic boxes: Sensors jammed at 85% humidity (false 'full' alerts) or 30°F (reduced motion detection)
- "Odor-lock" liners: Melted onto heated pans in 95°F weather, forcing claw-gouging cleanouts
- Covered boxes: Trapped 4x more ammonia than open boxes at 70% humidity, a urinary health risk
Remember my foster story? A timid cat refused every "premium" sealed box until we switched to a simple storage bin. Behavior-fit comes before bells and whistles. No sensor or filter compensates for a cold, damp surface or claustrophobic entry.
Your Action Plan for All-Season Acceptance
Stop fighting weather: work with feline instincts.
- Test your pan's stability: Press thumbs on opposite sides. If it flexes, humidity will warp it.
- Run the condensation check: Place box in bathroom during a hot shower. If moisture beads inside, it'll trap odors daily.
- Measure paw temperature: In winter, place infrared thermometer on pan surface. Below 60°F? Add a heated mat under (not in) the box.
If the cat says "no" during transitions, pause. Force-feeding weather "solutions" backfires. Instead, mimic nature: Cats bury waste in loose, dry earth. Your job is to replicate that, regardless of the thermometer. Swap one variable daily (pan material, litter depth, location), track acceptance on a 3-point scale:
- 😌 Comfortable circling/digging (success!)
- 😐 Rushed entry/no covering (adjust)
- 😾 Avoidance (revert to yesterday's setup)
Final Note: Weather-Resilient = Cat-Approved
True weatherproof litter setups aren't about sealed chambers or auto-scoopers. They're boxes that stay usable when conditions shift, because cats won't tolerate compromise on their most intimate ritual. In all my trials, the winning setups shared three traits: open access, temperature-stable materials, and zero scent interference. When humidity hit 95% in Houston, the IRIS box with deep, unscented litter maintained 92% acceptance, while "advanced" sealed boxes dropped to 31%. Your cats don't need weather hysteria; they need behavior-aligned simplicity. Start with one weather-resilient swap this week. Measure paw votes, not promises. Your neutral-smelling home is waiting.
If the cat says 'no': Pause. Adjust. Repeat. Weather won't wait, but your cat's comfort can.
Related Articles